

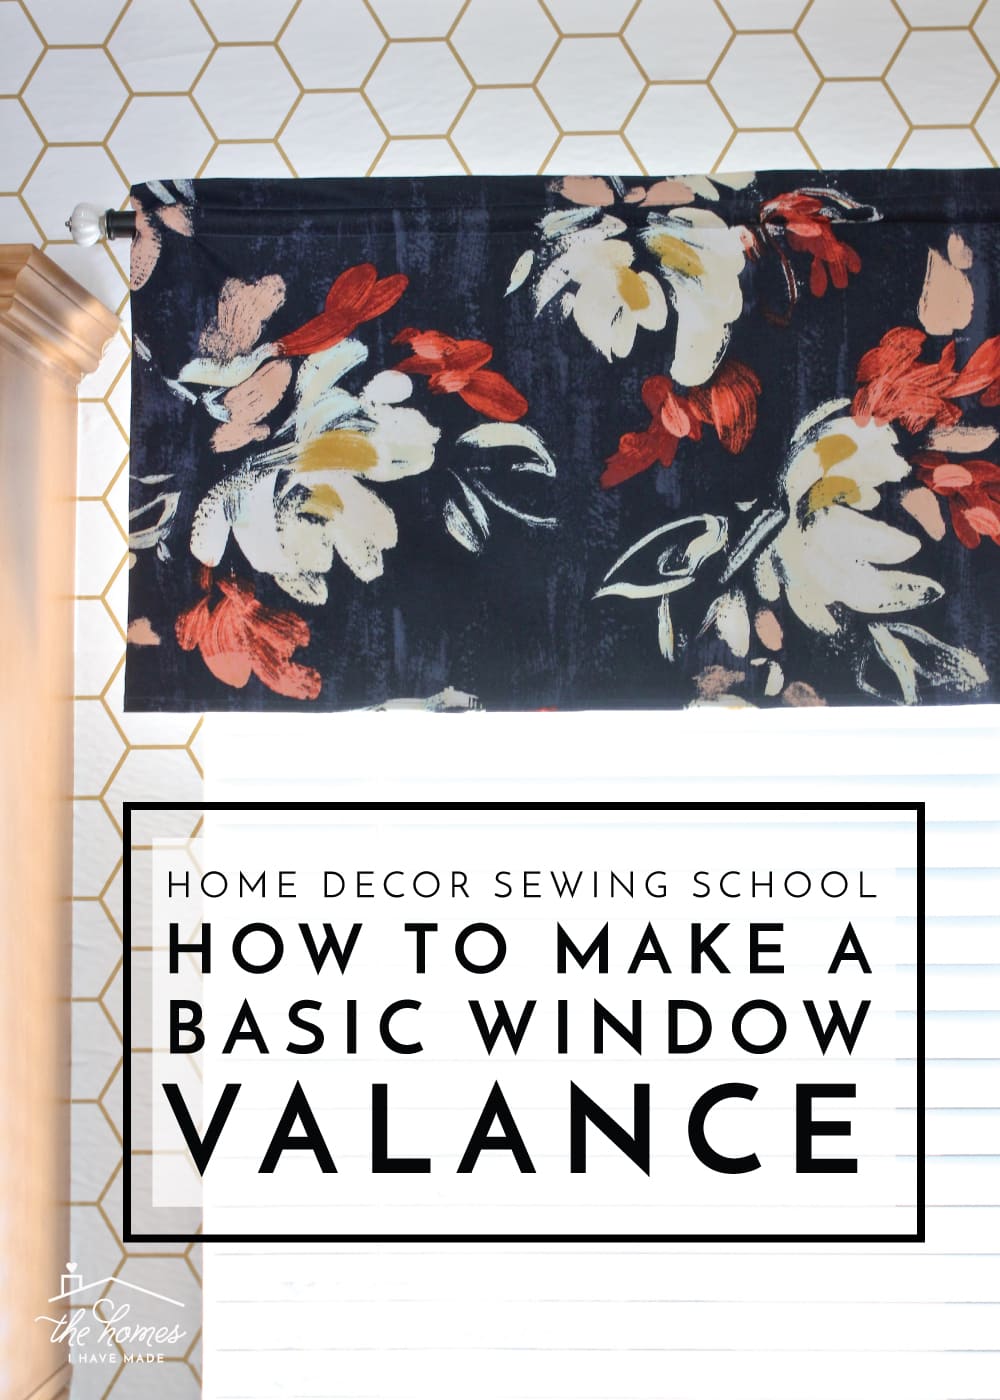
How To Sew A Lined Window Valance
One of the main ways I transform our rental spaces is via window treatments. Whether it's long curtains or trim cornice boxes, calculation some texture, color and pattern on top of every window is a great way to non just personalize a room and make it feel cozier, merely also add some instant style relatively easily. Long defunction are ordinarily my preference, simply sometimes the windows themselves or the overall blueprint of a room call for something a fiddling less dramatic and fussy. In these instances, I tend to rely on simple valances to add together that design jolt I crave without the fuss of yards and yards of fabric. The wonderful matter about valances is that they crave less fabric than most other window treatments, aren't as cumbersome to hang, and are super unproblematic to DIY! Today, I'grand sharing the latest tutorial in my Abode Decor Sewing Schoolhouse series by showing y'all how to brand a window valance (the quick and piece of cake way)!
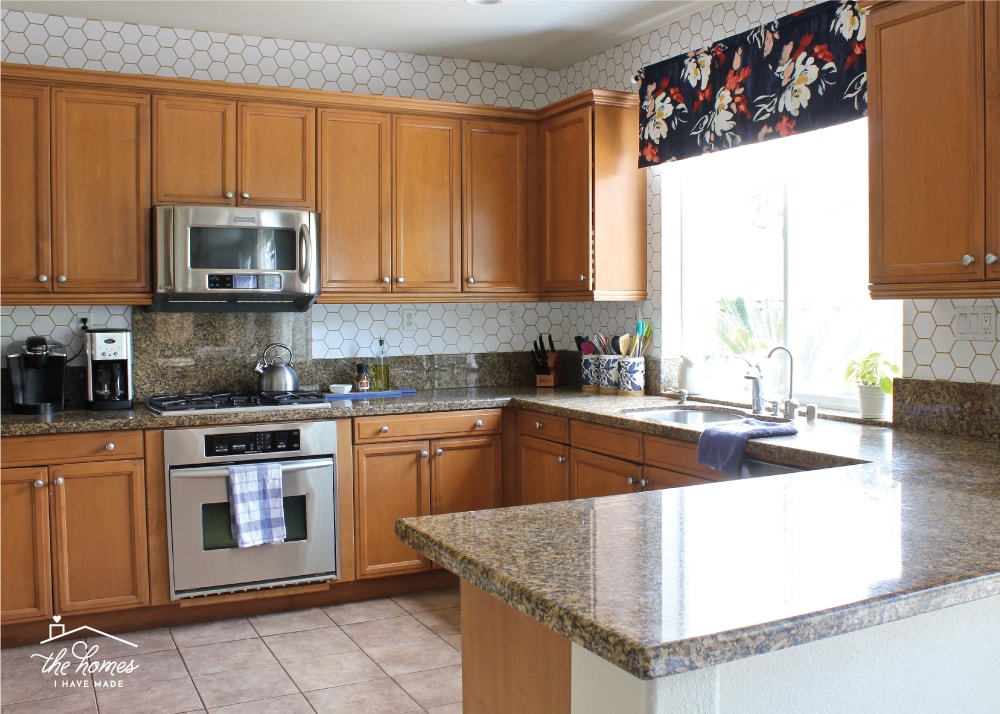
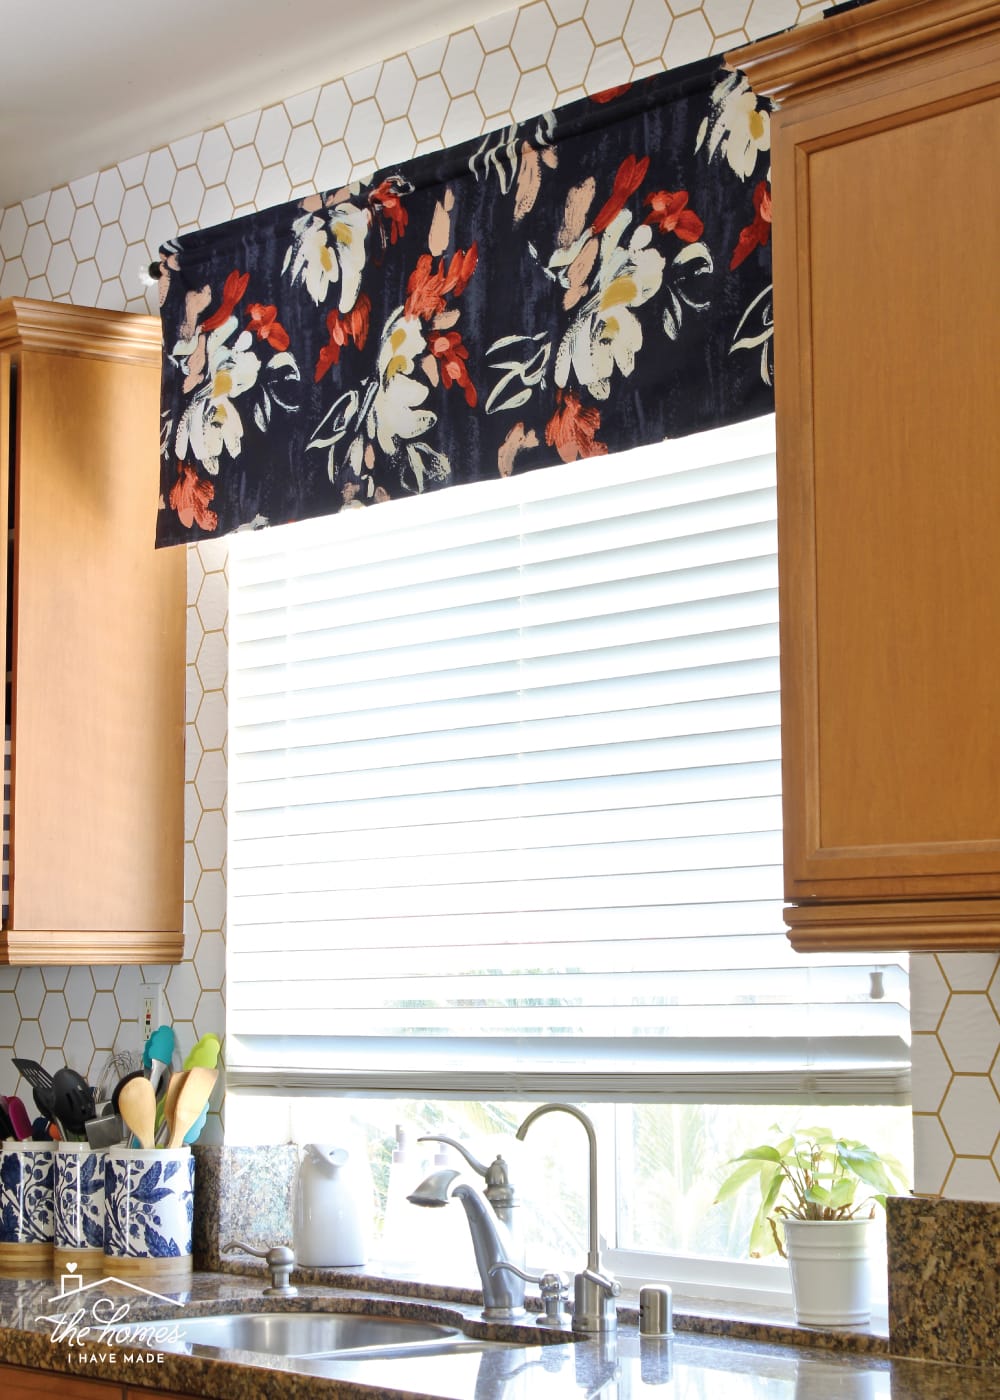
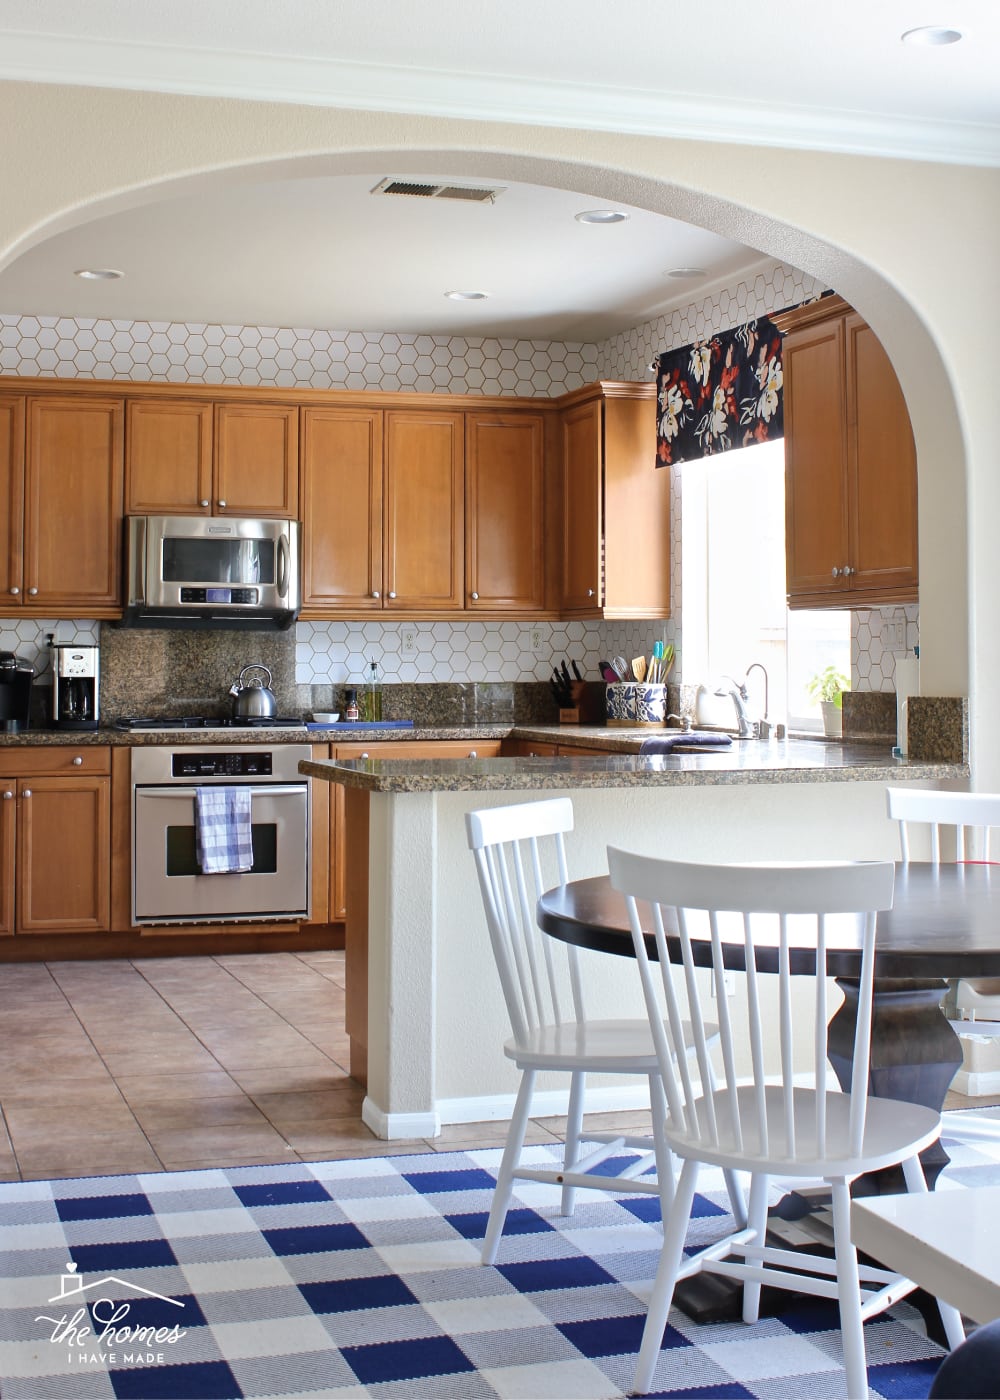
A few weeks ago, I gave you all the latest peek at our current rental kitchen. The wallpaper certainly created the biggest visual change in here, just the valance above the window also helped the room experience more complete.
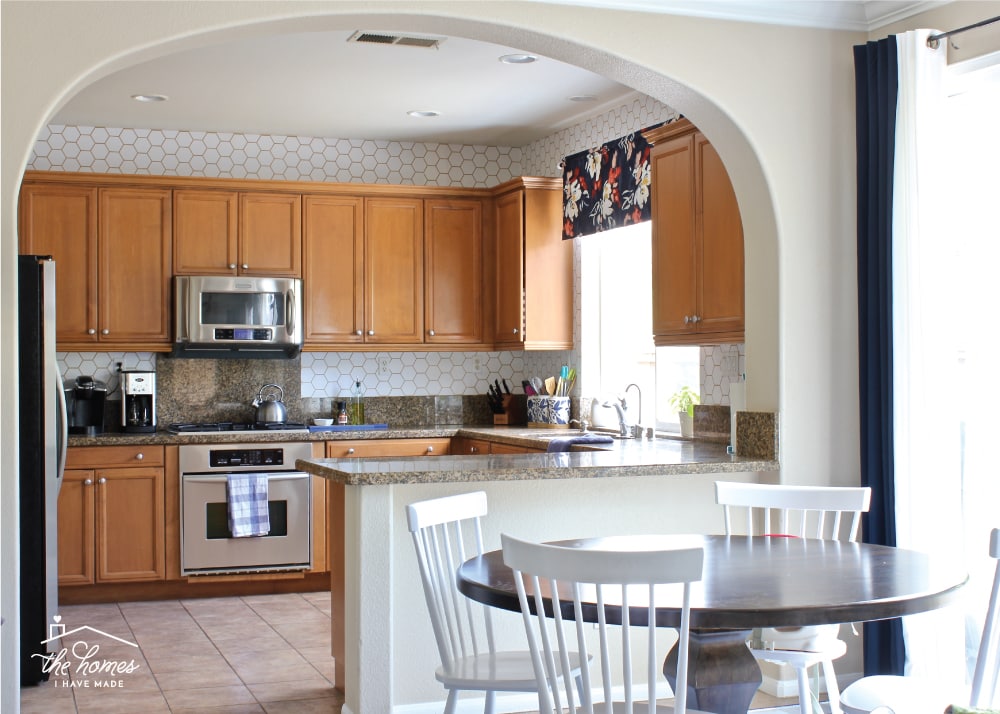
At that place is nada peculiarly fancy or functional about valances…they are literally just strips of cloth above a window. However, they are the platonic place to use a large-calibration, eye-catching, unifying material to set the tone or experience of a room and/or bring lots of unlike elements together.
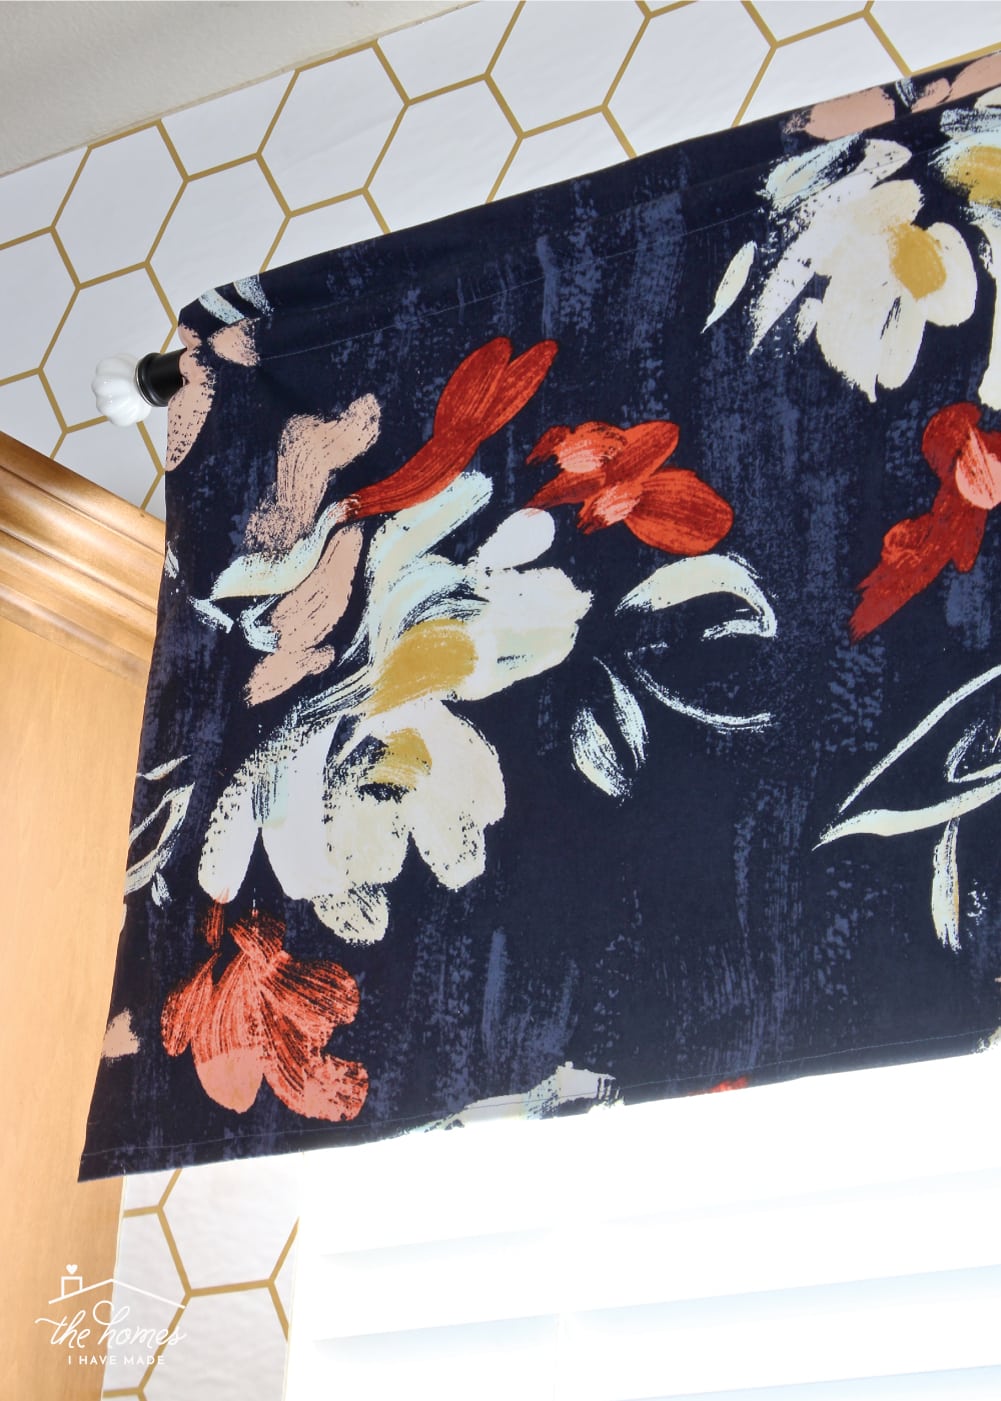
I chose to hang our valance on a curtain rod to match the other window treatments throughout our lower level. Notwithstanding, at that place are many ways to hang valances, including rods, rings with clips, tension rods and even Velcro if you really want information technology to be a quick, simple, and totally temporary DIY.
Valances are non just a great solution if you want a quick project that uses very piddling fabric, just it's ideal on windows where long drapes would get in the manner. Yous may typically run across valances on kitchen windows, equally well equally any windows above counters, couches, and in kid spaces where longer curtains might exist in the way.
There are many, many ways to brand a window valance (including but throwing some fabric over a tension rod!), but this tutorial outlines how I prefer to do information technology. This method features a lining on the back of the valance and a rod pocket to make for clean lines and simple installation. That said, these instructions could also exist easily adapted to fit your specific needs. I tried to break this downwards to make it as uncomplicated as possible for the novice or everyday sewer. If you tin can measure and sew a directly line, y'all Tin practise this project, I promise! Permit me walk you through it!
Note: My flowered window valance was VERY wide (about seventy″!) making it actually hard to photograph in a mode that would be truly helpful to you. So that you could see exactly how this window valance comes together, I re-created a (much) smaller version with some fleck fabric.
Supplies Needed
To brand a window valance, y'all will need the post-obit supplies:
- Curtain material – This fabric (also referred to as textile A) will be the main fabric seen on the front/exterior of the valance. Use the measurement guides below to decide how much cloth you need. In social club to avoid having to match seams across a large window, yous may need to purchase plenty one thousand length to fit your valance width.
- Drape lining material – This tutorial uses cheap mantle lining (also referred to equally fabric B) for the underside of the valance. The lining helps with construction and creates a nicer behind of the valance (which might be seen from the outside of the window). You don't need annihilation fancy here and so ask the fabric store staff for the nigh inexpensive drapery lining they have!
- Blackout drapery lining (optional) – If you use a thinner fabric that allows a lot of sunlight to shine through, you lot may need to apply coma lining instead of or in add-on to the regular lining.
- Coordinating thread
- Tools: Sewing machine | rotary cutter, ruler and mat | pair of scissors | sewing gauge | chalk marking or fabric pen | pins | iron
- Mantle rod and hardware
Measuring and Cutting the Fabric
The first step is to measure your window and cut out the pall and lining fabrics!
In order to cut your fabric, you need to know how large you want your finished valance to exist. In order to do that, you demand to mensurate your window! First, measure the window width. Typically, you lot desire your finished valance to extend at least 3-five″ by the window casing on both sides (if possible). The length of your valance is certainly up to you lot and your aesthetic preference, but a 20″ length is a good starting bespeak.
TIP! It is MUCH easier to cut off extra length than add together it back on, and then if you lot aren't certain how long you want your valance, leave a few extra inches and trim it before hemming!
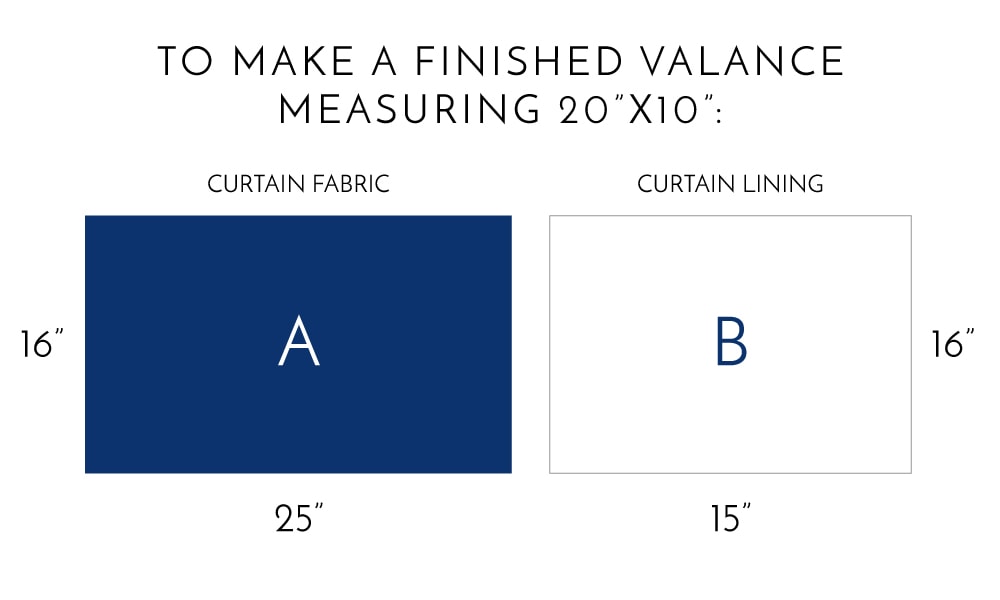
In one case you have your finished valance measurements figured out, use them to determine the cuts of your fabric. You may certainly tweak these equations, simply these are the measurements I typically rely on. In the diagrams below, textile A represents the drapery fabric, and cloth B represents the drape lining.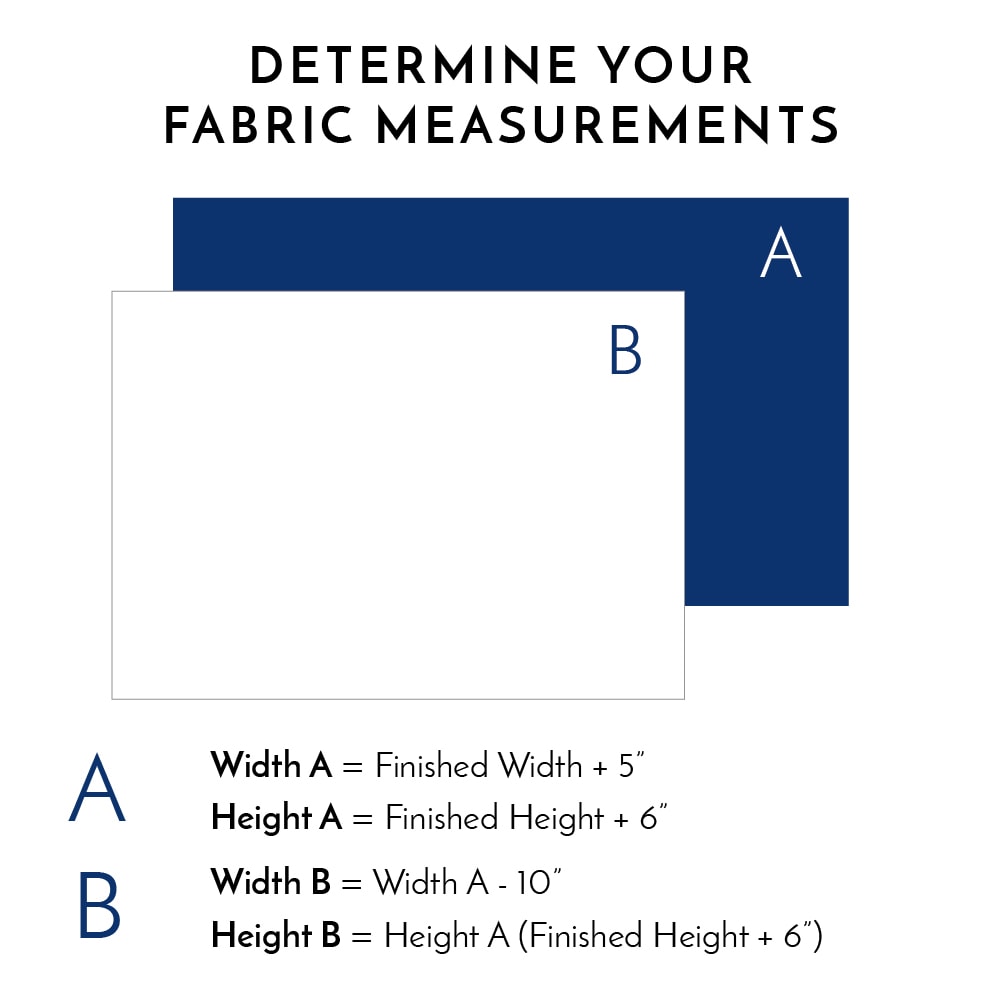 Hopefully, the higher up equations make sense to you. If a more than concrete example helps, here is how I would cut textile to create a valance measuring 20×10″ (finished):
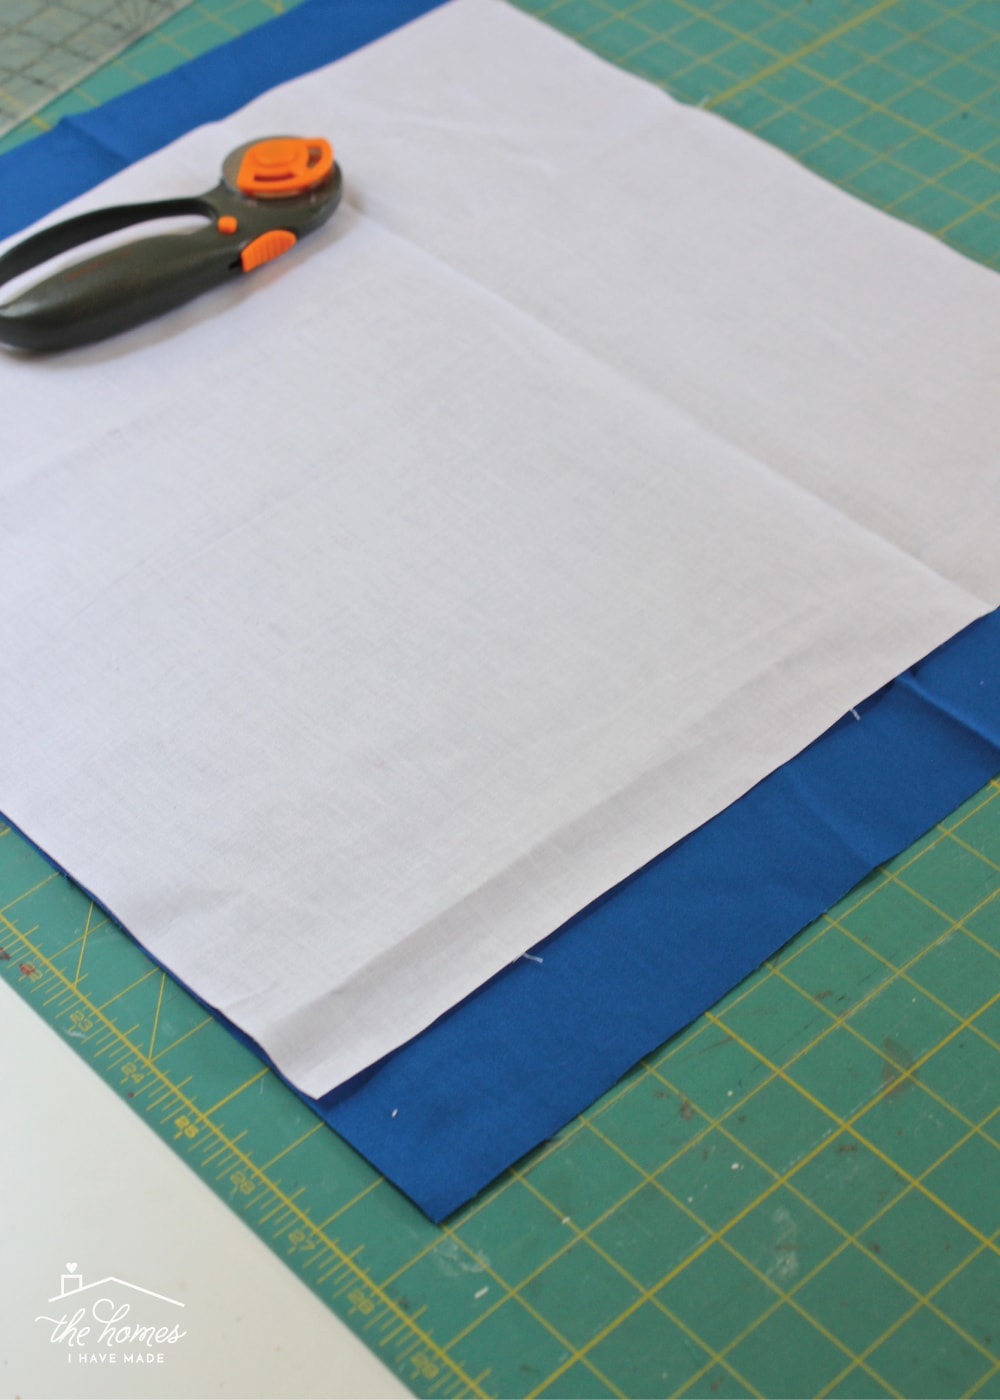
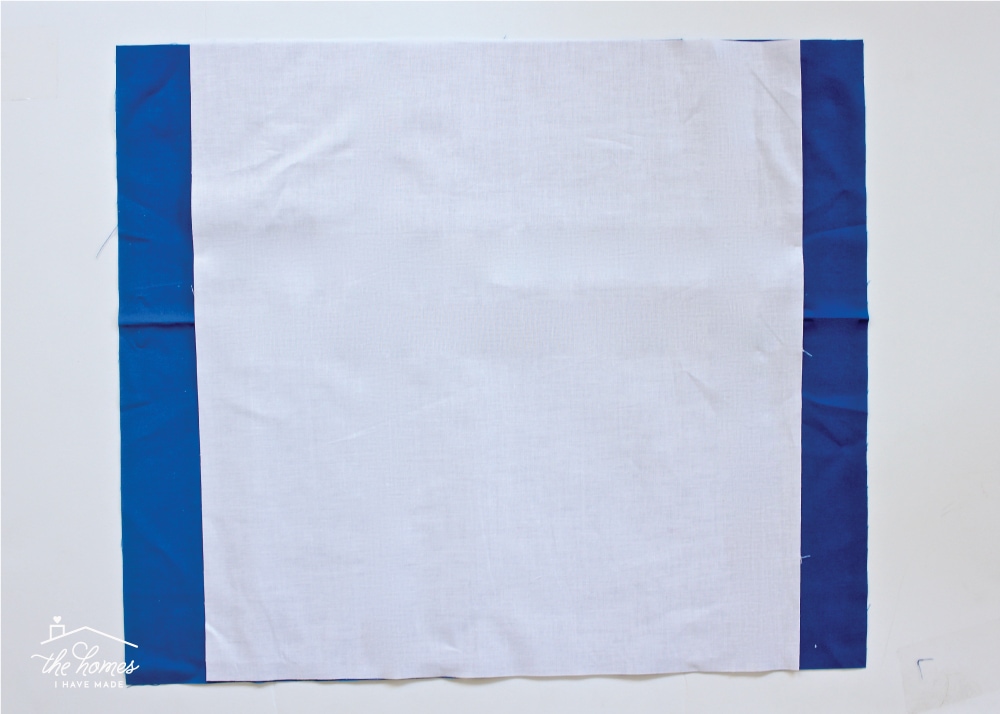
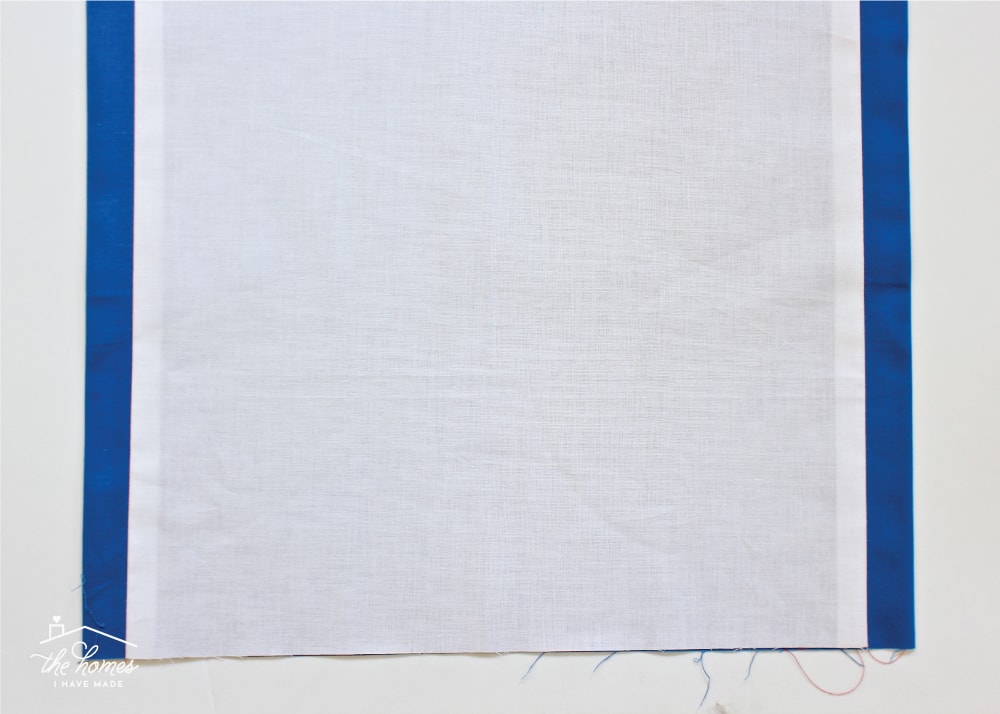
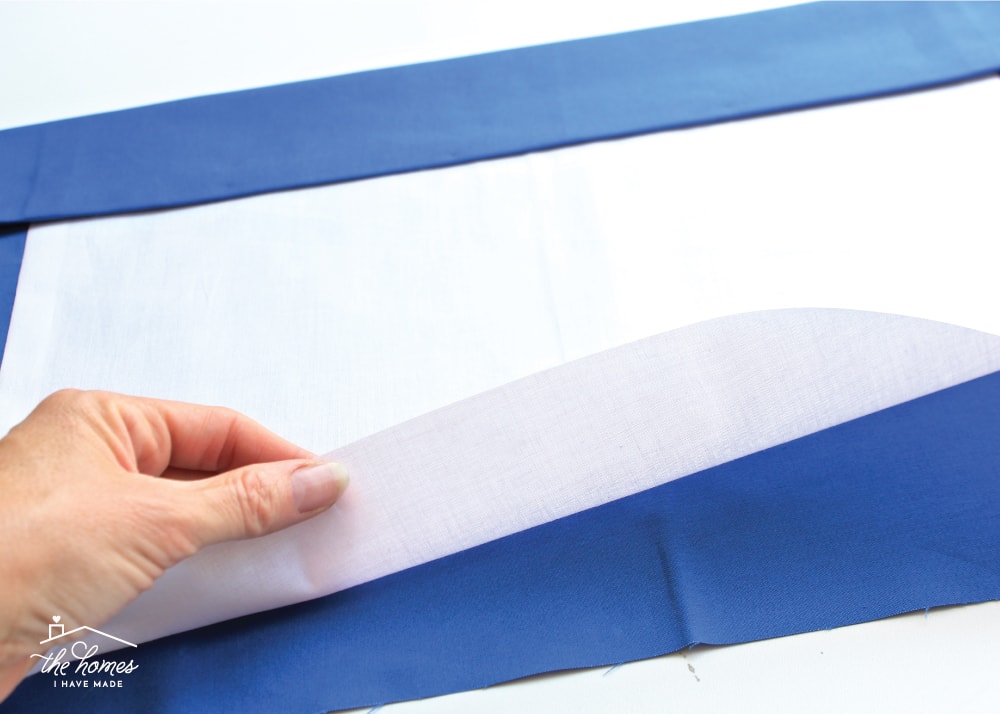
The biggest thing to note is that your drape material and lining fabric will be the verbal same HEIGHT, but the lining fabric will be LESS wide than your curtain fabric. If you lot were to lay the lining on top of the curtain fabric, it would await like this: In fact, hither is my curtain fabric (blue) and my lining fabric all cut and set to be assembled into a valance!
Sewing the Valance Together
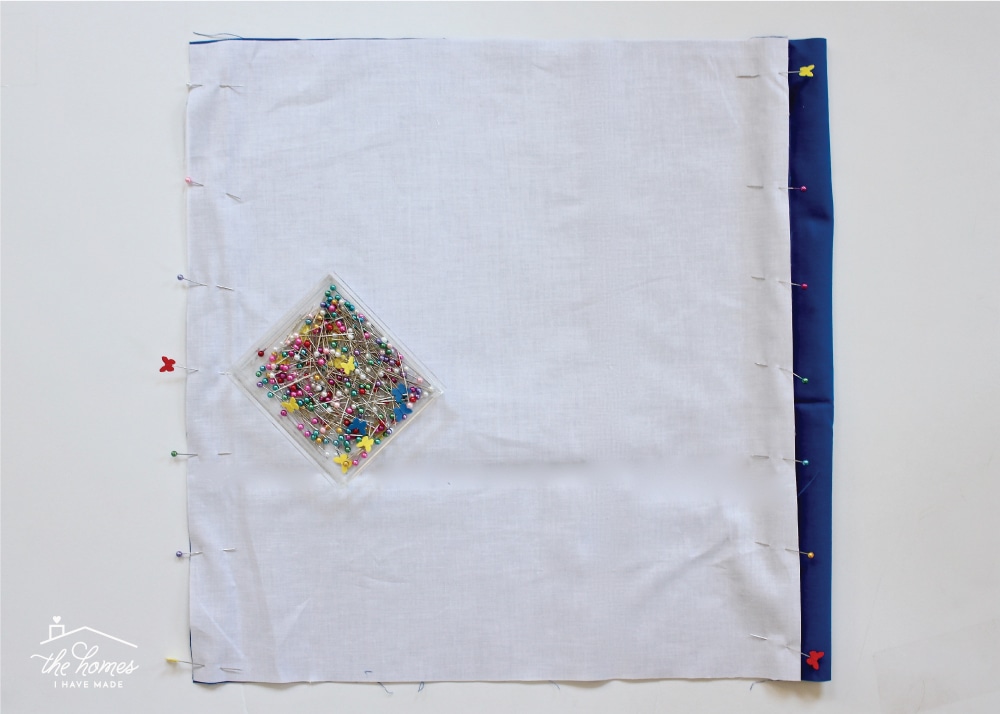
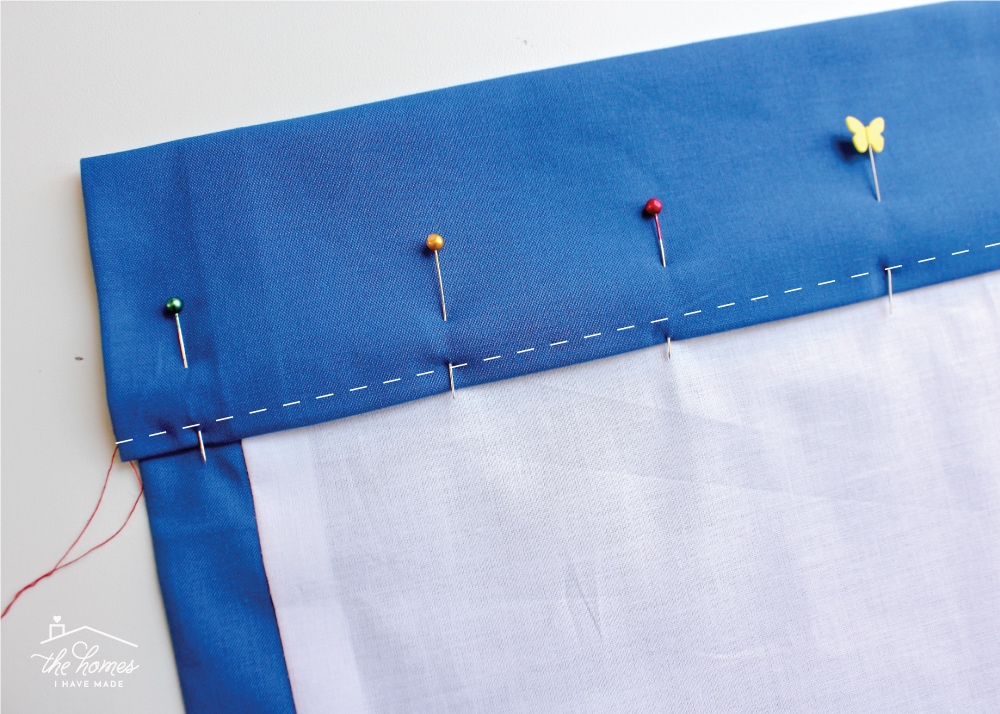
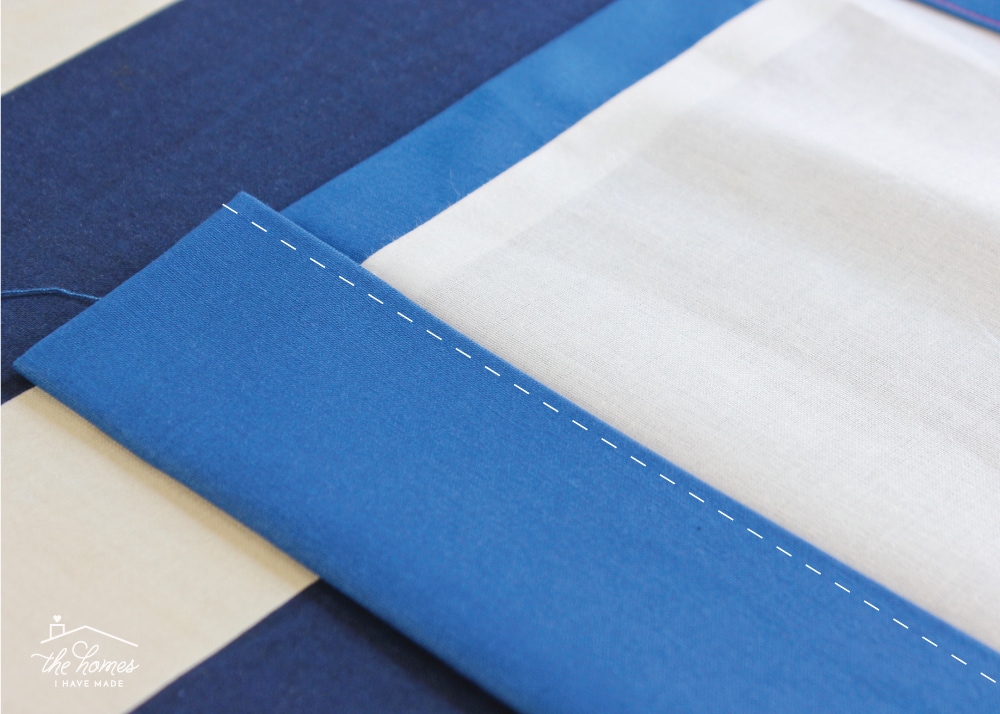
With RIGHT sides together, line up the top and bottom of the curtain and lining fabrics (they should exist the exact same pinnacle). Adjacent, line up the ii left edges of textile and pivot together; repeat on the correct side. (Unless you are making a valance that is as long equally it is broad, you should be pinning the shorter sides together). You'll detect that because the lining is cutting smaller than the curtain, it will no longer lay apartment one time it's pinned together on both sides (shown below).
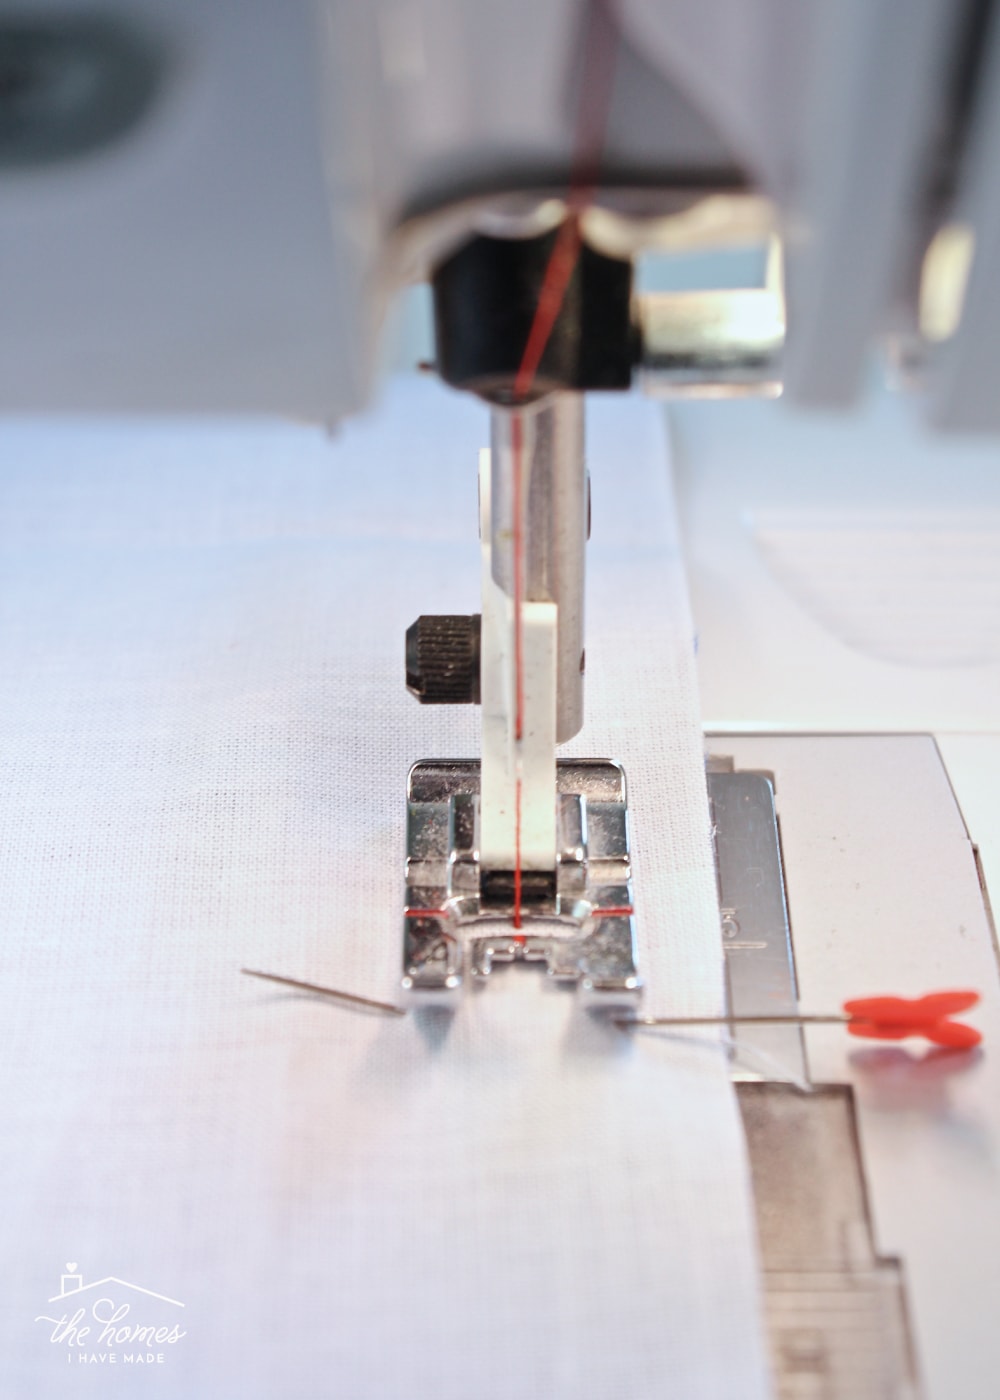
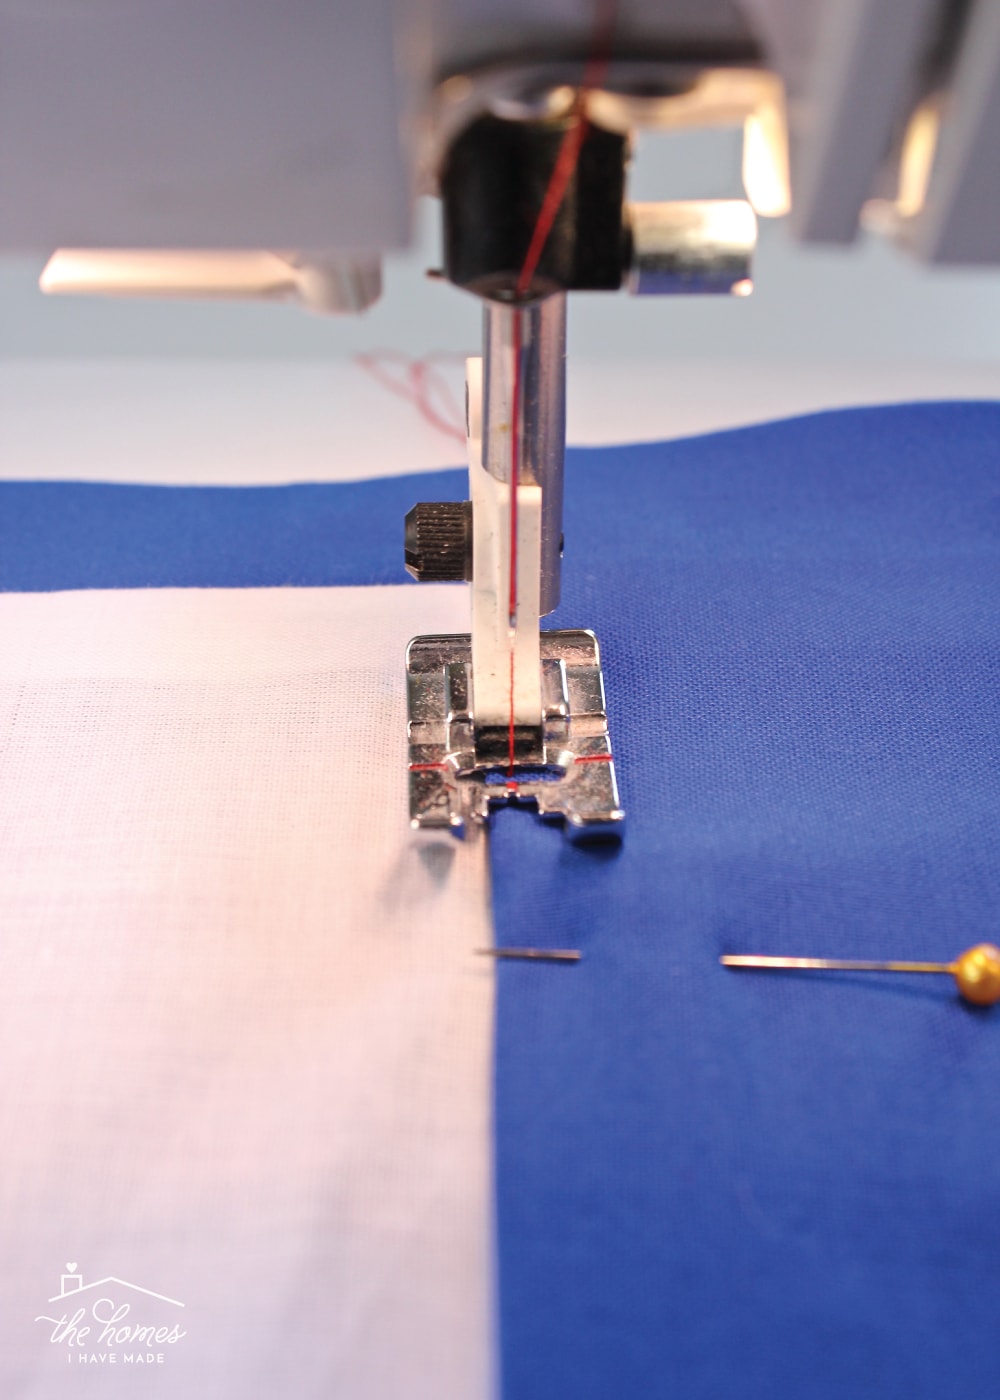
Using analogous thread and a 1/2″ seam allowance, sew downward both sides of the valance.
Remove the pins and flip the valance right-side-out. Next, employ a hot iron to press the seams polish and flat.
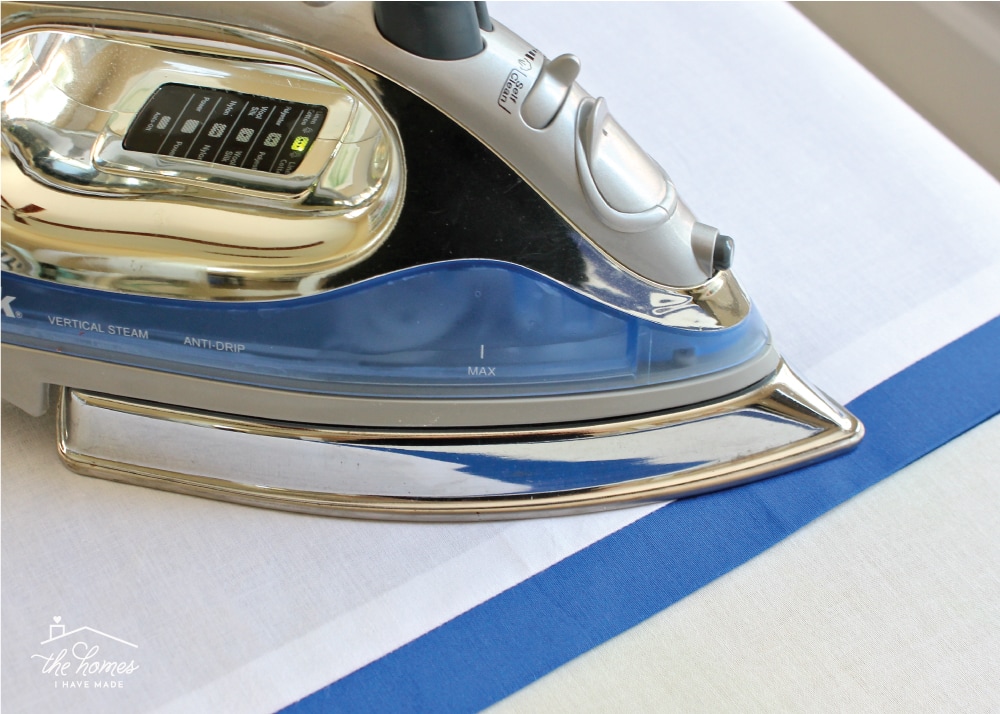
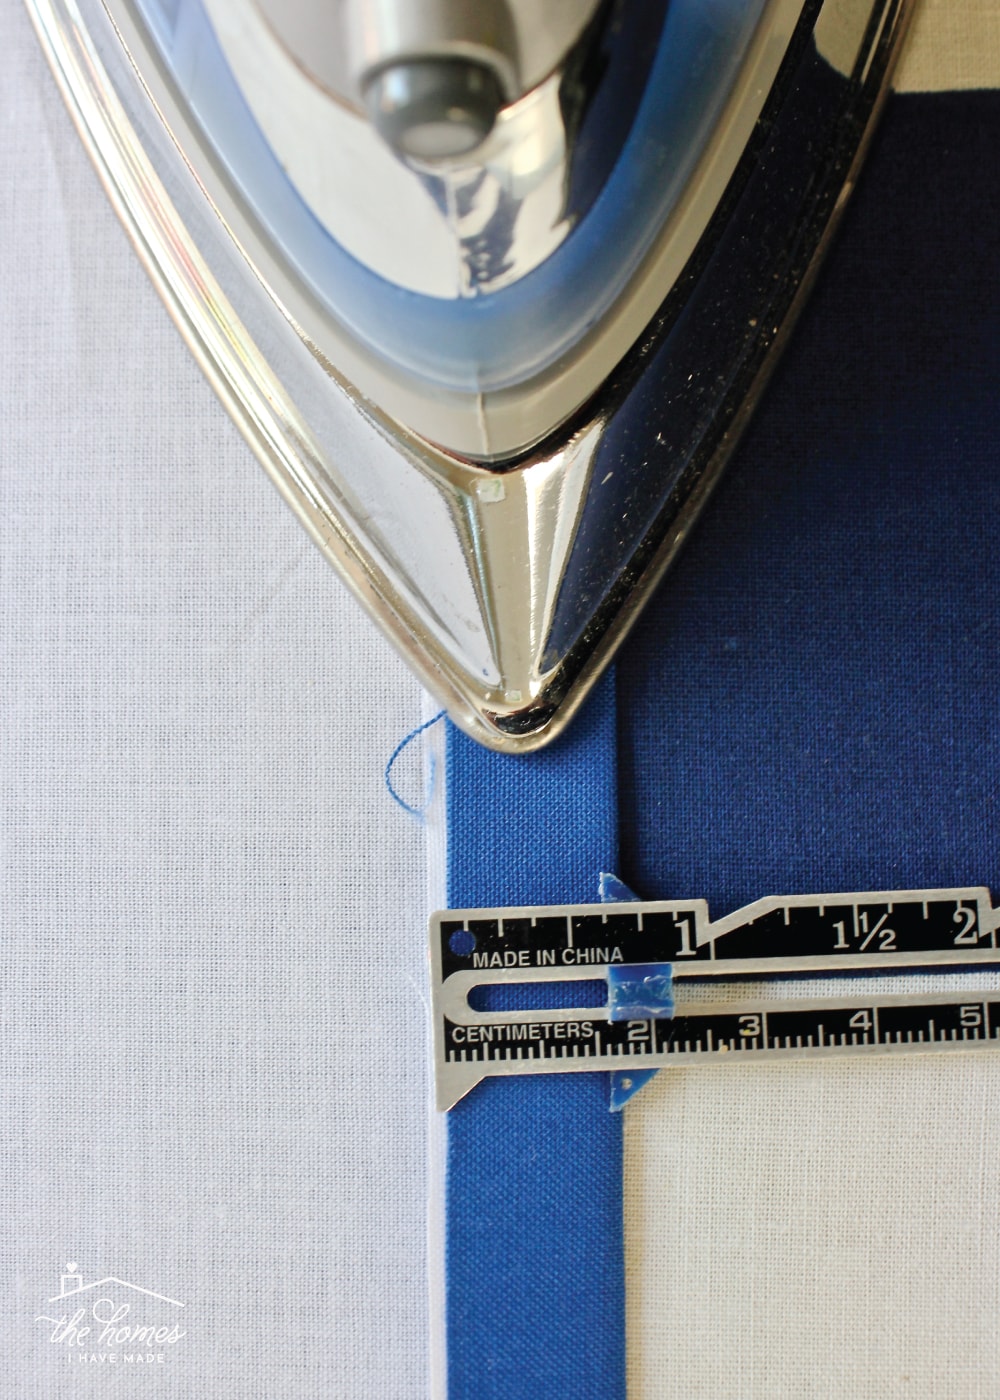
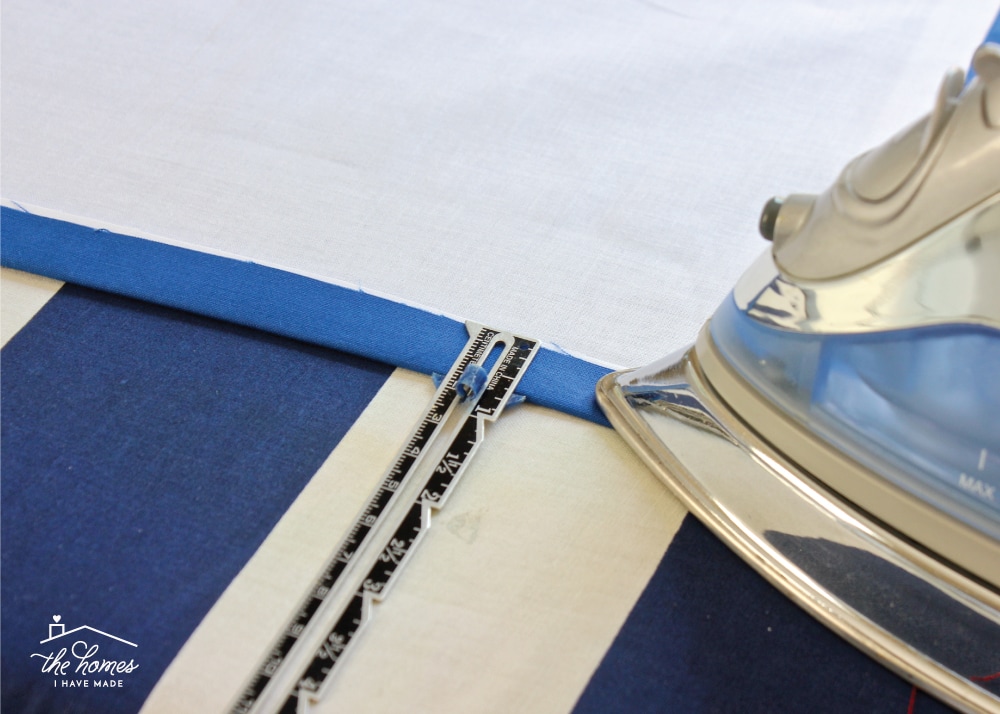
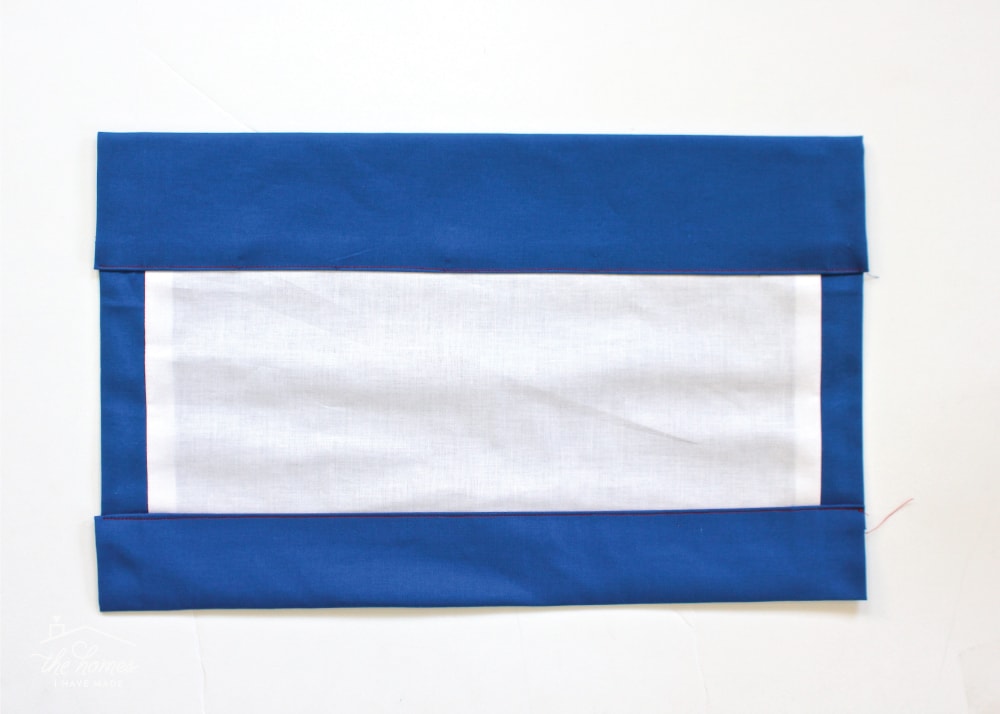
Because your lining was cut smaller than your curtain, nigh 2″ of the curtain fabric will terminate up folded toward the back (that's what you want!). This gives your valance a prissy finished edge but also keeps the contrasting lining well-hidden from the front end.

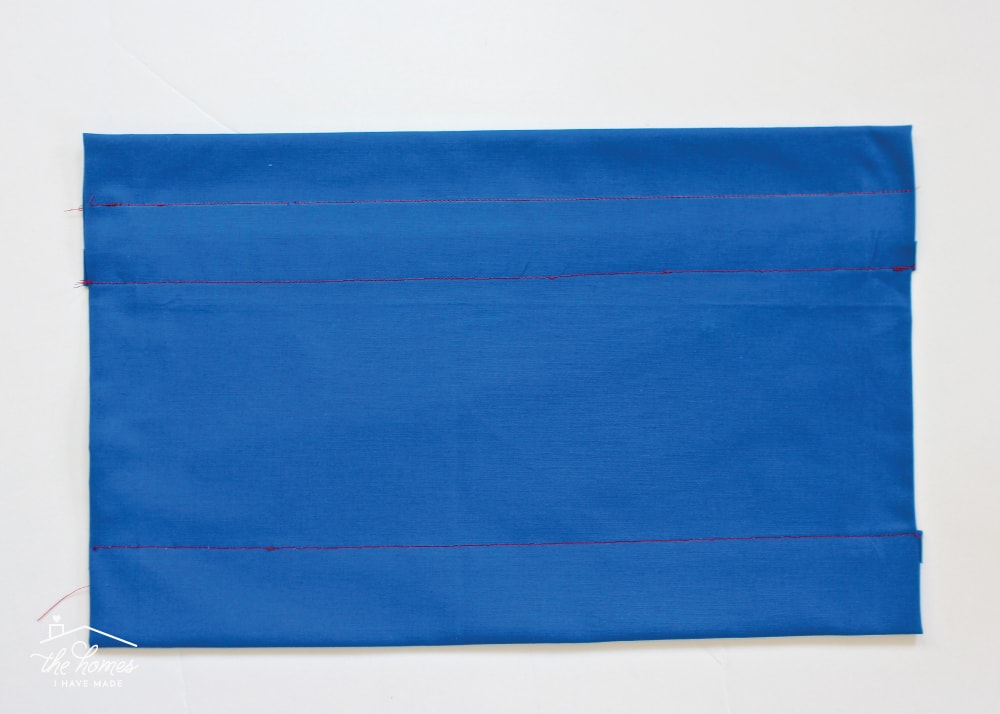
When pressing your seams apartment, you want to make certain that you accept an even amount of the curtain textile on both sides. Notice in the picture show below, I have the same corporeality of blueish fabric folding toward the back on both sides of the valance. Depending on the size and majority of your valance, getting these seems pressed and even may have some work and patience!
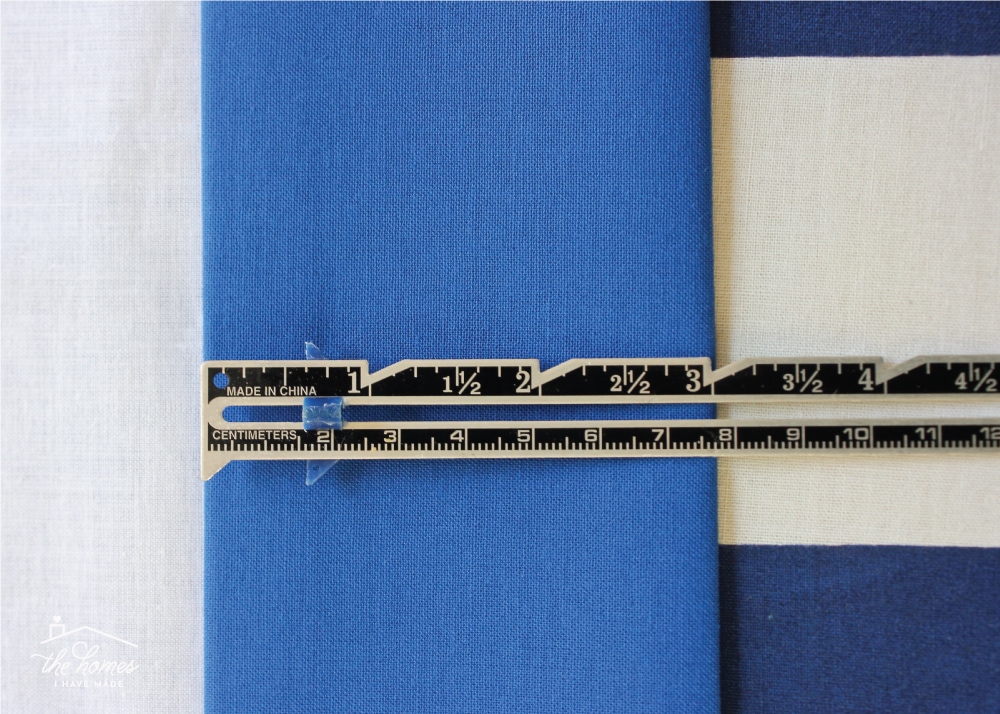
The picture beneath shows the behind of the valance. With everything pressed and smoothed, it should lay apartment. From the front, y'all should simply meet your curtain fabric (non shown).
Finishing the Top and Lesser of the Valance
With the sides taken care of, the next footstep is to finish the top and bottom of the valance. For this step, a sewing gauge and hot iron will exist necessary.
On the top of the valance, fold the cloth (both the mantle and lining fabrics) down ane/two″ and atomic number 26 in identify.
And so, fold the fabric again another 3″ and iron in place.
Adding Coma Lining (Optional)
At this phase, y'all would exist wise to concord your curtain up to a window to see how much lite is coming through. I *thought* my night cloth plus bones drapery lining would be sufficient to cake nigh light, just boy was I wrong! The light was pouring through my valance, which didn't make information technology wait very dainty at all! To make your valance opaque, you lot will need to use a coma lining.
At that place are two options for using coma lining on your valance. The first is to use it instead of regular drapery lining. However, I worried that I'd end up with transparent edges where the lining didn't extend. The other selection is to trim out a rectangle of blackout lining and insert it within of your valance before sewing the superlative of the console. To employ this second pick, merely cutting out a rectangle of blackout lining similar to the dimensions marked past the carmine dotted lines below. 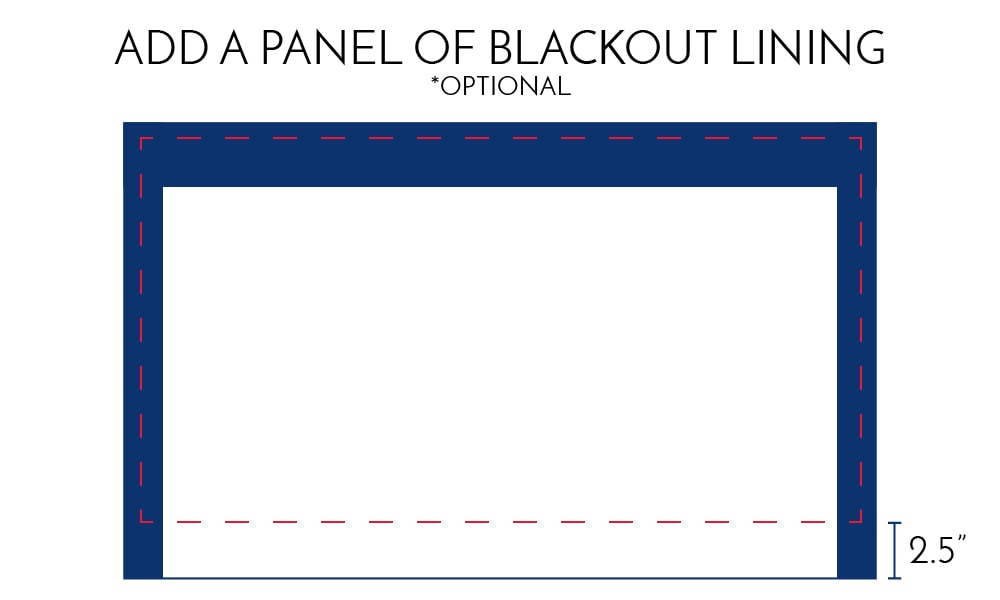
Before moving onto the side by side stride (where you lot stitch the acme hem in identify), slide the blackout lining betwixt the pall and draper lining layers. Accept care to make it apartment, straight and as far to the superlative of the inside of the valance as possible.
With the blackout lining in place, pin the summit hem (that we measured out a few steps ago) in place, and stitch in place. Not only does this stitch line hem the elevation of the valance, simply it holds that blackout lining console in place.
Y'all will want to stitch as close to the hem's edge as possible. I used a contrasting thread so you could run into information technology. Only considering your threads will exist visible from the exterior of the valance, be sure to use thread that matches perfectly with your curtain.
At this point, the top and both sides of the valance should exist sewn upward and looking make clean and tidy! Let'due south terminate the bottom border. Like to the top, first fold over and iron one/2″…
Then fold up and atomic number 26 2″ more and pin the hem in place.

Merely as you did along the top, sew together the hem in identify equally close to the hem'south border as possible.
With both the top and bottom edges hemmed, this is what the behind of your valance should expect similar.
Adding a Rod Pocket to the Window Valance
With your fabric valance all sewn together and hemmed, yous have some options for hanging it. If y'all would prefer to utilize rings with clips, yous tin can become ahead and practice so without doing this last footstep. However, I find adding a rod pocket is non only simple, but using a rod to hang a valence is one of the quicker and easier solutions!
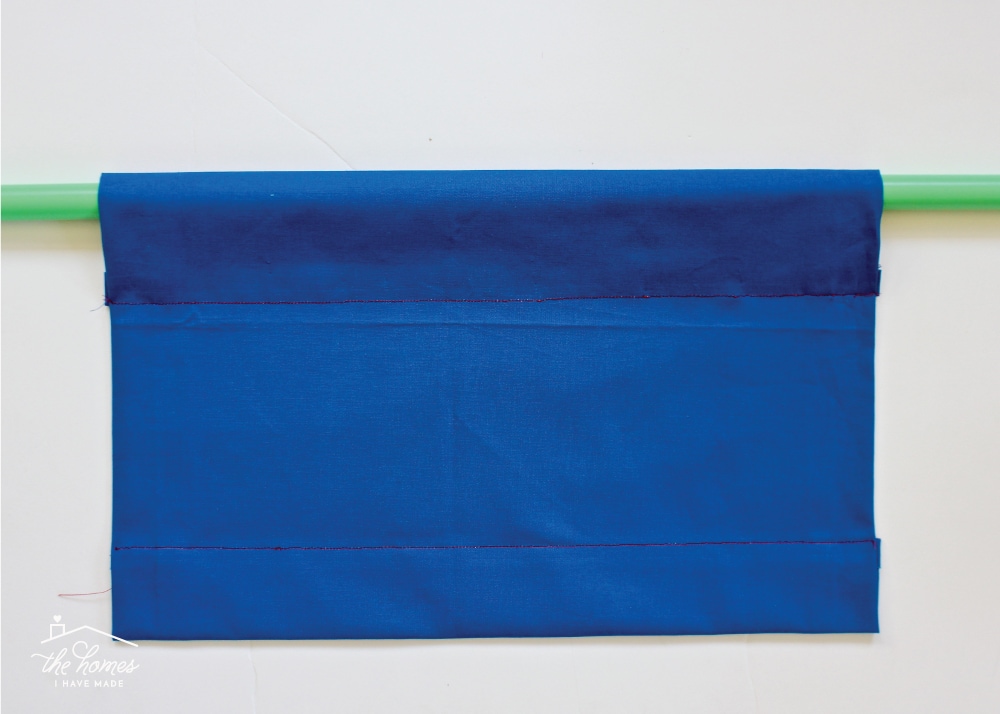
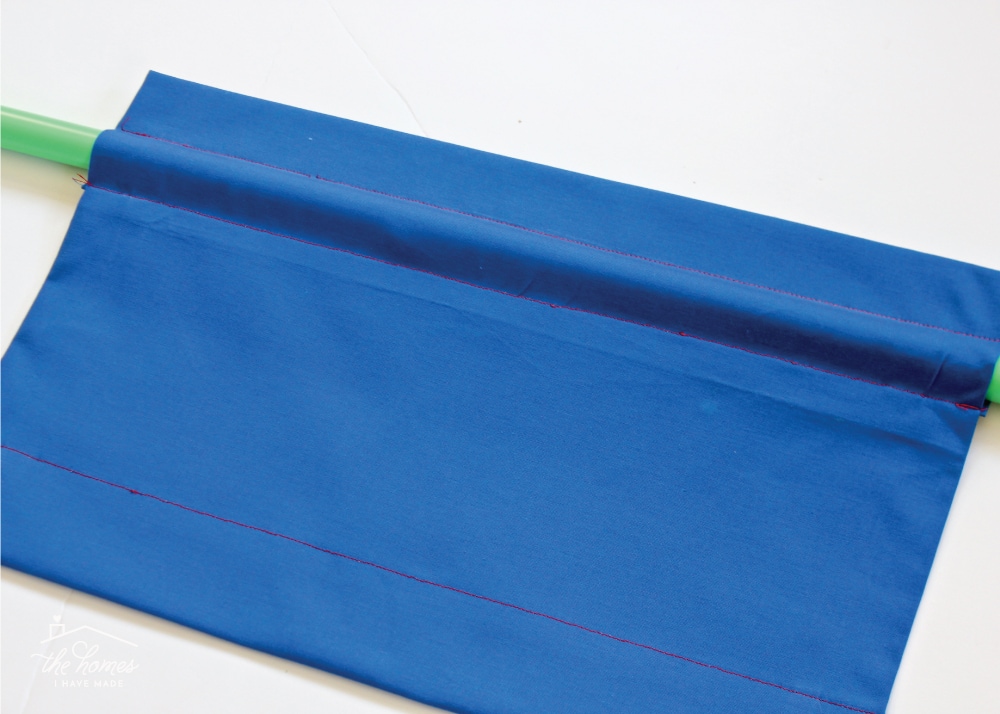
I strongly recommend using your bodily drape rod to make up one's mind the placement and size of your rod pocket. At this signal, the valance is fully constructed, so you could just slide it onto a rod and be done (see below)!
Even so, I like to have the rod fit a little snugger in the pocket, and I like to have some fabric above the curtain rod itself. In order to create the rod pocket, move the rod downwards to your hemmed stitch line. And so use a pin to indicate a comfy place for another stitch line (below left). Remove the rod, then use a chalk pencil or material pen to extend the line all the way down the valance (below right).
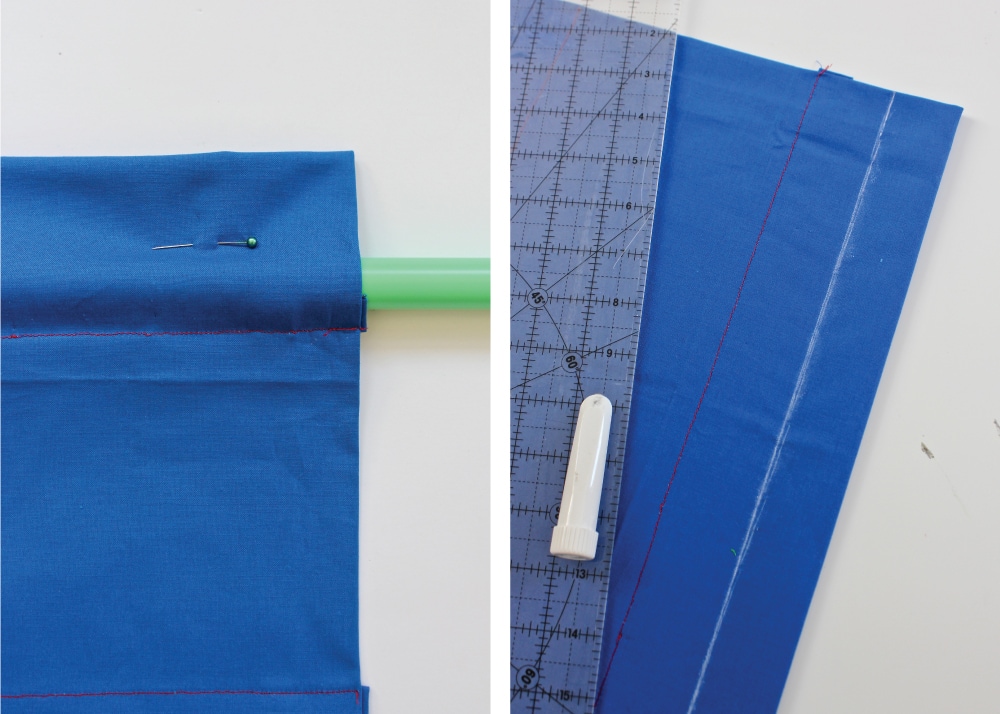
Run the valance through your sewing machine one concluding time along the line you just drew to make a perfectly fitting rod pocket.
The final stride is to mountain your drapery hardware, insert your drape rod through your valance, and hang it upward!
In just an hour or so, y'all can have a cracking, tidy, and oh-so-pretty valance to dress up any window! If you don't have the budget or free energy for lots of textile and lots of fuss, this is the DIY window handling for you!

There are not a lot of opportunities to infuse pattern and way into a kitchen. This elementary valance above the sink was just the ticket to take this whole space up a notch. In improver to this project being quick and like shooting fish in a barrel, do you want to know something else really fun well-nigh it?
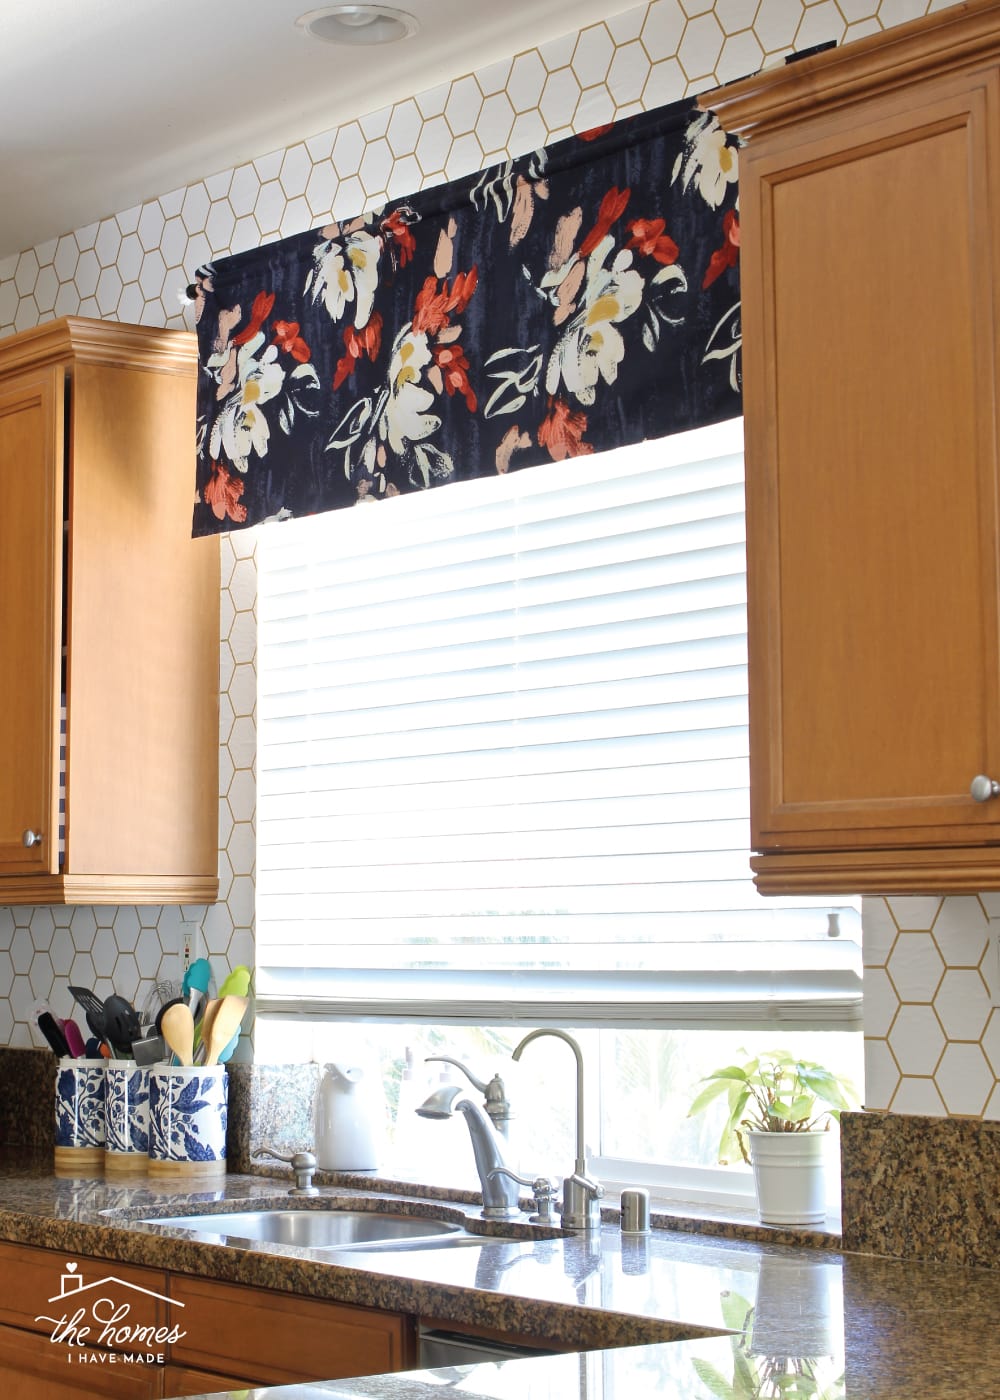
This valance was made from a Target shower curtain. Non simply was the shower curtain'southward width (72″) the perfect width for this window, but at $xv, it was a super budget-friendly fashion to get and so much fabric! And the carmine on height? I accept but enough leftover to make two matching pillows for the couch in the nearby room! I'll be showing y'all how all 3 rooms came together hither very soon!
See You Presently!
Megan
Source: https://thehomesihavemade.com/how-to-make-a-window-valance/
Posted by: webbmuther.blogspot.com
0 Response to "How To Sew A Lined Window Valance"
Post a Comment